
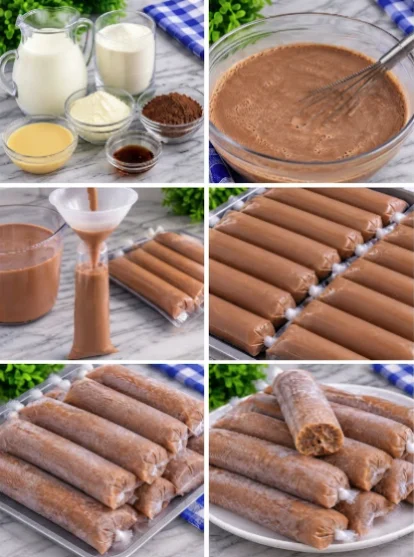
As the summer heat rolls in, nothing beats the refreshing feeling of cooling off with a delicious frozen treat. Introducing Milk & Milo Ice Pops, a delightful concoction that combines the creamy richness of milk with the chocolatey flavor of Milo, a beloved malted chocolate drink that has delighted taste buds for generations. This recipe is not just a gourmet indulgence; it’s a nostalgic experience that captures the essence of childhood summers spent enjoying simple pleasures. With just a few ingredients and an ice pop mold, you can whip up these creamy frozen treats in no time, making it the perfect solution for quick frozen treats for kids and adults alike. Whether you’re lounging by the pool, hosting a summer gathering, or simply looking for a way to cool off on a hot day, these easy summer desserts will certainly impress. Plus, they are a fantastic way to involve the kids in the kitchen, creating memories while making these delightful ice pops together. The combination of milk and Milo not only satisfies your sweet tooth but also brings a sense of comfort, reminding many of the joy of summer days past. Imagine sitting outside on a warm afternoon, ice pop in hand, reminiscing about carefree times — that’s the magic these pops hold.
Ingredients
To create the perfect Milk & Milo Ice Pops, gather the following ingredients: You can learn more about this topic. The simplicity of the ingredients makes it easy for anyone to recreate this recipe, even if you are a novice in the kitchen. Each ingredient contributes to the overall flavor and texture, ensuring a delightful treat for everyone who tries them.
- Wet Ingredients:
- 2 cups whole milk—using whole milk provides a rich, creamy base that enhances the mouthfeel of the pops, creating a luxurious experience with every bite.
- 1 cup chocolate milk (store-bought or homemade)—using homemade chocolate milk can elevate the flavor profile, allowing for greater customization in sweetness and chocolate intensity. This also enables you to control the quality of the ingredients, ensuring a better taste.
- 1/2 cup Milo powder—this is the star ingredient, bringing that distinct malted chocolate flavor that pairs beautifully with milk. The key to achieving the authentic taste of Milk & Milo Ice Pops lies in using genuine Milo powder, which is rich in vitamins and minerals.
- 1/4 cup sweetened condensed milk (optional for extra creaminess)—this ingredient is optional, but it adds a luscious texture that makes the pops even more enjoyable, creating a silky smooth finish that melts in your mouth. The sweetness from the condensed milk complements the chocolate flavor beautifully.
- Optional Toppings:
- Chopped nuts (like almonds or hazelnuts)—they add a delightful crunch and nutty flavor, complementing the creamy texture of the pops. The contrast of textures enhances the overall enjoyment of the treat.
- Mini chocolate chips—these can create a fun surprise in every bite, adding bursts of chocolate that contrast with the smoothness of the pops. They also contribute to the visual appeal, making the ice pops more enticing.
- Fresh fruit pieces (like banana or strawberries)—these offer a burst of freshness and color, making your ice pops even more appealing and nutritious. Fruits can add a natural sweetness that balances the richness of the chocolate.
For best results, use high-quality ingredients. If you prefer a lighter option, you can substitute whole milk with low-fat milk or a dairy alternative, though the texture may vary slightly. Almond or oat milk can add an interesting twist to the flavor, introducing nutty or sweet notes that can complement the chocolate. Check out our related guide for more tips on ingredient substitutions and enhancements that could take your Milk & Milo Ice Pops to the next level. Using organic or farm-fresh milk can also enhance the flavor and quality of your pops, making them a wholesome choice that you can feel good about serving to your family.
Steps / Instructions
- Prepare the Milo Mixture: In a mixing bowl, combine the Milo powder with the chocolate milk and stir until fully dissolved. This will create a rich chocolate base with a delightful aroma, making your kitchen smell like a chocolate factory. Make sure to use lukewarm chocolate milk to help dissolve the Milo powder more easily and ensure a uniform consistency without lumps.
- Add Milk: Slowly pour in the whole milk and sweetened condensed milk (if using). Mix until everything is well combined and smooth, ensuring there are no lumps of Milo powder left. The mixture should be velvety and thick, inviting you to have a taste. If you notice any clumps, use a whisk or a blender for an even smoother consistency. Whipping the mixture can also incorporate some air, making the pops lighter.
- Taste and Adjust: Taste the mixture and adjust the sweetness according to your preference. If you want a stronger chocolate flavor, add more Milo powder. Take a moment to savor the rich, creamy taste before moving on to the next step; this is your chance to make it perfect! You can also experiment with adding a pinch of sea salt to enhance the flavors.
- Fill the Molds: Carefully pour the mixture into ice pop molds, leaving a small gap at the top to allow for expansion as they freeze. This step requires a steady hand to avoid spills, so take your time. You can use a funnel for easier pouring, which minimizes mess and makes the process smoother. Ensure the molds are clean and dry to prevent any unwanted flavors from affecting your ice pops.
- Add Toppings: If desired, sprinkle your chosen toppings (chopped nuts, mini chocolate chips, or fruit pieces) on top of the mixture before inserting the sticks. This not only adds flavor but also makes the pops visually appealing with colorful specks that invite curiosity. Feel free to mix and match toppings to suit your taste and create your signature Milk & Milo Ice Pops.
- Insert Sticks: Place the sticks into the molds, ensuring they are centered and upright. This will help the sticks stay in place as the mixture freezes solid. Press the sticks in gently to avoid disturbing the toppings, which can create a beautiful layered effect in your pops.
- Freeze: Place the molds in the freezer for at least 4-6 hours, or until completely frozen. For best results, let them freeze overnight. The longer they freeze, the easier they will be to remove from the molds. Avoid opening the freezer door too often, as this can affect the freezing process and cause uneven texture in your pops.
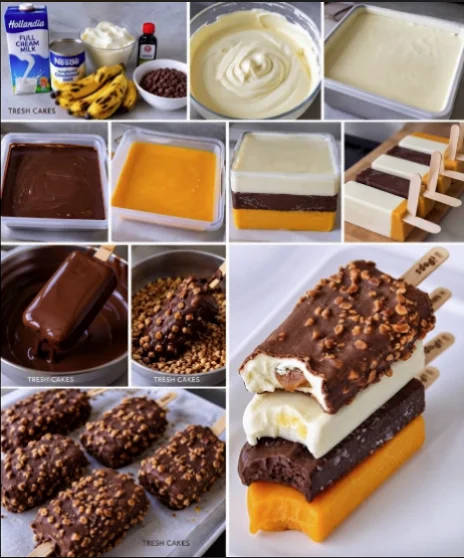
- Unmold and Serve: To release the ice pops, run warm water over the outside of the molds for a few seconds. This gentle warmth will help loosen the pops and make them easier to remove. Gently pull on the sticks to remove the pops without breaking them. Enjoy your Milk & Milo Ice Pops! They make a fantastic after-school snack or a sweet treat during a summer barbecue. Consider serving them with extra fresh fruit or a drizzle of chocolate sauce to elevate the experience and impress your guests.
Tips & Tricks
Creating the perfect Milk & Milo Ice Pops is easy with a few handy tips:
- Storage: Store any leftover ice pops in an airtight container in the freezer. They can last for up to two weeks, but they’ll likely be devoured long before then! Wrapping them individually in plastic wrap can also help prevent freezer burn, ensuring they remain fresh and tasty when you’re ready to enjoy them again.
- Make-Ahead: This recipe is perfect for meal prep. Make a batch ahead of time and enjoy them on hot days when you need a quick and refreshing snack. They are also perfect for parties, as they can be made in large quantities, allowing your guests to enjoy a taste of summer without any fuss.
- Avoid Common Mistakes: Ensure the molds are filled to the appropriate level to prevent overflow, and wait until the pops are fully frozen to avoid a messy removal. Check the pops after the suggested freezing time to ensure they are solid before attempting to remove them. If they are still too soft, give them more time in the freezer, as patience is key to achieving the perfect texture.
- Pro Technique: For a creamier texture, use full-fat ingredients. Additionally, blending the mixture in a blender can help create a smoother consistency, breaking down any clumps of Milo powder and integrating the ingredients beautifully. Experimenting with the blend duration can also yield different textures, from a creamy finish to a more ice-like texture, suitable for various preferences.
Milk & Milo Ice Pops
A delightful concoction that combines the creamy richness of milk with the chocolatey flavor of Milo, a beloved malted chocolate drink.
Ingredients
- 2 cups whole milk
- 1 cup chocolate milk (store-bought or homemade)
- 1/2 cup Milo powder
- 1/4 cup sweetened condensed milk (optional)
- Chopped nuts (optional)
- Mini chocolate chips (optional)
- Fresh fruit pieces (optional)
Directions
In a mixing bowl, combine the Milo powder with the chocolate milk and stir until fully dissolved.
Slowly pour in the whole milk and sweetened condensed milk (if using). Mix until everything is well combined and smooth.
Taste the mixture and adjust the sweetness according to your preference.
Carefully pour the mixture into ice pop molds, leaving a small gap at the top.
Sprinkle your chosen toppings on top of the mixture before inserting the sticks.
Place the sticks into the molds, ensuring they are centered and upright.
Place the molds in the freezer for at least 4-6 hours, or until completely frozen.
To release the ice pops, run warm water over the outside of the molds for a few seconds.
Nutrition Facts
Recipe Reviews
- ★★★★★
Excellent recipe!
Leave a Reply
Your email address will not be published. Required fields are marked *
Excellent recipe!