
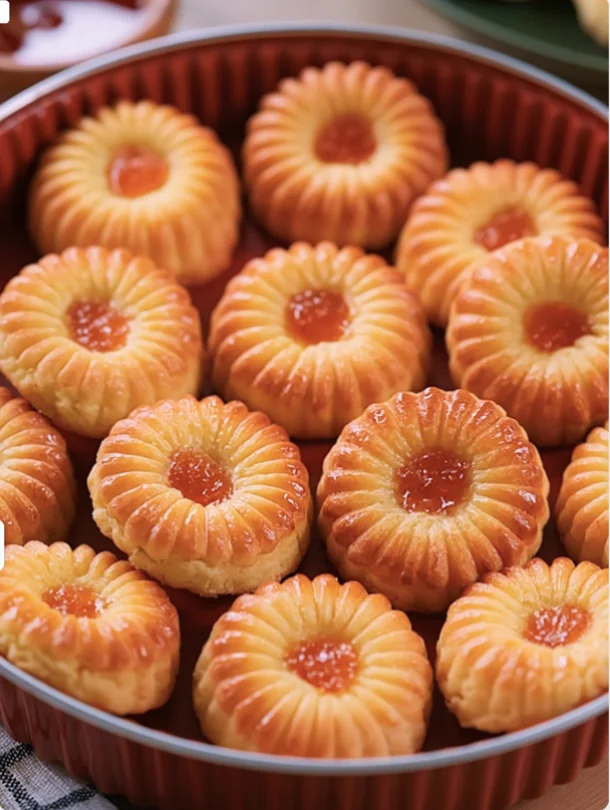
Danish butter cookies are a delightful treat that perfectly exemplifies the art of Scandinavian baking. With their rich, buttery flavor and tender texture, these cookies are a favorite for many, transcending generations. In Denmark, they are often served during special occasions, particularly during the holiday season and for afternoon tea. What makes this recipe particularly special is its simplicity, requiring just four ingredients to create a batch of cookies that are both elegant and delectable. This minimalist approach showcases the quality of the ingredients, allowing the buttery flavor to shine through in every melt-in-your-mouth bite. Whether you’re a seasoned baker or just beginning, these easy cookie recipes will elevate your tea time or dessert table. The allure of Danish butter cookies lies not only in their taste but also in their versatility; they pair wonderfully with a variety of beverages, such as coffee, tea, or even a glass of milk, making them a go-to choice for both casual gatherings and formal celebrations. Baking these cookies can also evoke warm memories of family traditions, as many people share their own stories of baking them with loved ones during the holidays or special events.
Ingredients
- Dry Ingredients:
- 2 cups all-purpose flour
- 1/2 cup powdered sugar
- Wet Ingredients:
- 1 cup unsalted butter, softened
- 1 teaspoon vanilla extract
For the best results, be sure to use high-quality unsalted butter as it enhances the flavor of these rich and buttery cookies. The butter should be at room temperature, soft enough to leave an imprint when pressed but not melted; this will ensure a creamy texture when combined with sugar. If you prefer, you can substitute the vanilla extract with almond extract for a unique twist that adds a fragrant nuttiness. Additionally, if you want to experiment, consider using flavored extracts like hazelnut or coconut for an interesting flavor profile. The quality of the flour also plays a significant role; using a brand that is finely milled will yield a lighter texture in the finished cookies. You can learn more about this topic.
Steps / Instructions
- Preheat your oven to 350°F (175°C). This ensures that your cookies bake evenly and achieve that perfect golden brown color. Allowing the oven to fully preheat is crucial for consistent results, as cookies can spread too much if placed in a cold oven. For those with an oven thermometer, checking the accuracy of your oven temperature can lead to even better results.
- In a large mixing bowl, cream the softened butter and powdered sugar together until the mixture is light and fluffy, about 3-5 minutes. This step is crucial as it incorporates air into the batter, making the cookies tender. You can use an electric mixer on medium speed for the best results, but a sturdy spatula or wooden spoon works if you prefer mixing by hand. If you’re using a mixer, be sure to scrape down the sides of the bowl halfway through to ensure everything is evenly mixed.
- Add the vanilla extract to the butter-sugar mixture and mix until well combined. Take a moment to appreciate the aroma; the scent of vanilla pairs beautifully with the buttery notes and elevates the overall flavor profile of the cookies.
- Gradually sift in the all-purpose flour, mixing until just combined. Be careful not to overmix; you want a soft, buttery cookie dough. The dough should hold together but not be sticky. If it feels too dry, you can add a teaspoon of milk to achieve the desired consistency. Often, a well-mixed dough will have a slightly tacky feel without being overly sticky, which is ideal for shaping.
- Using a cookie scoop or tablespoon, drop rounded balls of dough onto a baking sheet lined with parchment paper, spacing them about 2 inches apart. This spacing allows for even spreading. Flatten each ball slightly with the palm of your hand or the bottom of a glass for a uniform shape, ensuring that they will bake evenly. For a decorative touch, you can use a fork to make a crosshatch pattern on top of each cookie.
- Bake in the preheated oven for 12-15 minutes, or until the edges are lightly golden. The centers may appear soft but will firm up as they cool. Keep an eye on them towards the end of the baking time, as oven temperatures can vary, and you don’t want to risk overbaking. For even baking, rotate the baking sheet halfway through the baking time.
- Remove the cookies from the oven and allow them to cool on the baking sheet for 5 minutes before transferring them to a wire rack to cool completely. This resting time allows them to set up a bit more for easier handling. Enjoy the fragrant aroma that fills your kitchen as the cookies cool!
Tips & Tricks
To achieve the best results with your Danish butter cookies, consider the following tips: Check out our related guide for more tips. These insights will help you perfect your cookie game and impress guests with your baking skills.
- Butter Temperature: Ensure that your butter is at room temperature before starting. Softened butter creams better with sugar, leading to a fluffier texture. If you forget to take it out ahead of time, you can cut it into small cubes to speed up the softening process. Alternatively, placing the wrapped butter in a bowl of warm water for a few minutes can also help.
- Storage: Store the cooled cookies in an airtight container at room temperature for up to a week. For longer storage, freeze the cookies in a single layer and then place them in a freezer bag for up to 3 months. Just remember to let them thaw at room temperature for a short while before serving to regain their soft, buttery texture. If you’d like to maintain their fresh-baked taste, consider reheating them in the oven for a few minutes before serving.
- Make-Ahead Option: The cookie dough can be made ahead of time and refrigerated for up to 3 days. Just let it sit at room temperature for about 10 minutes before baking. Alternatively, you can roll the dough into a log, wrap it tightly in plastic wrap, and freeze it. When you’re ready, simply slice the dough into rounds and bake straight from the freezer. This method is especially handy for unexpected guests!
- Common Mistakes: Avoid overbaking; the cookies should be slightly soft in the center when removed from the oven. They will continue to cook as they cool. A good rule of thumb is to take them out when they look just slightly underdone. Remember, every oven behaves a little differently, so use your best judgment.
- Decorating Tips: Feel free to sprinkle coarse sugar on top before baking for added texture and visual appeal, or dip half of the cooled cookies in melted chocolate for an indulgent twist. You can also drizzle melted chocolate or icing on top for an elegant presentation. For a festive touch, consider adding colored sprinkles or edible glitter for holidays or special occasions.
Variations
While this recipe is delightful in its traditional form, there are plenty of ways to customize your Danish butter cookies. You can add:
- Citrus Zest: Add the zest of one lemon or orange to the dough for a refreshing citrus flavor. The zest will brighten the cookies and add a unique aromatic profile that pairs well with tea. This small addition can elevate the taste and take your cookies to the next level.
- Chocolate Chips: Fold in 1 cup of chocolate chips to create a richer flavor. This addition adds a sweet, melty contrast to the buttery cookie base. Try using semi-sweet, milk chocolate, or even dark chocolate for different taste experiences.
- Nuts: Incorporate chopped pecans or walnuts for an added crunch. Roasting the nuts beforehand can enhance their flavor, making the cookies even more delicious. Be sure to chop the nuts finely for even distribution throughout the dough.
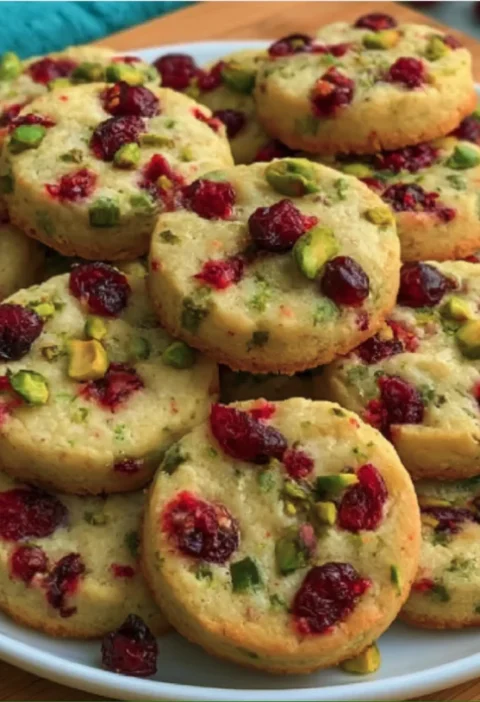
- Dried Fruit: Chopped dried cranberries or apricots can add a delightful sweetness and chewiness. This variation also makes the cookies visually appealing with pops of color. Consider pairing dried fruits with nuts for added texture and flavor complexity.
Conclusion
Now that you have the recipe for these classic Danish butter cookies, you can enjoy a taste of Denmark right at home. Their simplicity and rich flavor make them perfect for any occasion, from a cozy tea time to a festive holiday cookie exchange. So gather your ingredients and prepare to impress friends and family with these homemade butter cookies. Happy baking! Remember, the joy of baking is not just in the final product but also in the memories created while making them. Share these delightful treats with loved ones, and enjoy the smiles they bring! Don’t hesitate to customize your cookies or experiment with various flavors to make the recipe your own.
Danish Butter Cookies
Danish butter cookies are a delightful treat that perfectly exemplifies the art of Scandinavian baking. With their rich, buttery flavor and tender texture, these cookies are a favorite for many, transcending generations. In Denmark, they are often served during special occasions, particularly during the holiday season and for afternoon tea.
Ingredients
- 2 cups all-purpose flour
- 1/2 cup powdered sugar
- 1 cup unsalted butter, softened
- 1 teaspoon vanilla extract
Directions
Preheat your oven to 350°F (175°C).
In a large mixing bowl, cream the softened butter and powdered sugar together until the mixture is light and fluffy, about 3-5 minutes.
Add the vanilla extract to the butter-sugar mixture and mix until well combined.
Gradually sift in the all-purpose flour, mixing until just combined.
Using a cookie scoop or tablespoon, drop rounded balls of dough onto a baking sheet lined with parchment paper, spacing them about 2 inches apart.
Bake in the preheated oven for 12-15 minutes, or until the edges are lightly golden.
Remove the cookies from the oven and allow them to cool on the baking sheet for 5 minutes before transferring them to a wire rack to cool completely.
Nutrition Facts
Recipe Reviews
- ★★★★★
Excellent recipe!
Leave a Reply
Your email address will not be published. Required fields are marked *
Excellent recipe!