

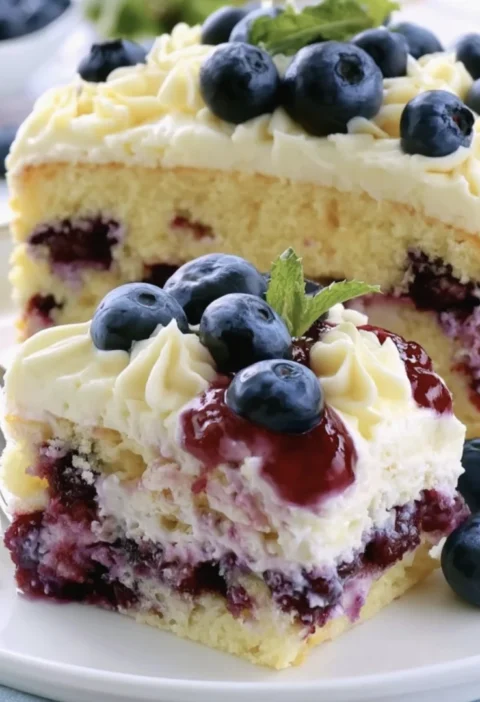
If you’re a fan of coffee, chocolate, and creamy desserts, then no-bake tiramisù truffles are about to become your new favorite treat! This delightful Italian dessert takes the classic flavors of traditional tiramisù and transforms them into rich, bite-sized truffles that require no baking at all. Perfectly suited for gatherings, these indulgent sweet treats are not only easy to make but also incredibly satisfying, especially for coffee lovers. With their decadent texture and rich flavor, they’re sure to impress your guests and leave them craving more. Imagine the smooth mascarpone mingling with the bold coffee and luscious chocolate, creating a truly heavenly experience with every bite. This dessert is not just a treat; it is a celebration of Italian culinary artistry, showcasing the balance of flavors that make tiramisù so beloved worldwide. Originating from the Veneto region of Italy, tiramisù translates to “pick me up,” which perfectly describes the energizing coffee flavor that these truffles embody. The story of tiramisù itself is filled with passion and creativity, as it is said to have been invented in the 1960s in a small restaurant, quickly gaining popularity for its rich and unique flavor profile.
Ingredients
Gather the following ingredients to create these luscious no-bake tiramisù truffles: You can learn more about this topic.
- Dry Ingredients:
- 1 cup of crushed digestive biscuits or ladyfingers – for a more authentic flavor, ladyfingers are preferred as they mimic the classic tiramisù base and absorb the coffee beautifully, providing a delightful texture.
- ¼ cup of cocoa powder (preferably unsweetened) – using high-quality cocoa can significantly enhance the richness of the truffles, providing a bold chocolate flavor that beautifully complements the coffee. Consider opting for Dutch-processed cocoa for a smoother, milder taste.
- Wet Ingredients:
- 8 oz (225g) of mascarpone cheese – ensure it is at room temperature for easier mixing; creamy and rich, it’s essential for the truffle’s luxurious texture and flavor. Look for mascarpone with a smooth and creamy consistency, ideally made from high-quality cream.
- ½ cup of heavy cream – this adds lightness and a creamy mouthfeel; you can also use whipping cream for a similar consistency, but heavy cream will provide a richer, more decadent result that enhances the truffle experience.
- ¼ cup of powdered sugar – adjust this based on your sweetness preference, but it helps to balance the bitterness of the cocoa and enhances the overall flavor profile, resulting in a harmonious sweetness without overpowering the other flavors.
- 2 tablespoons of strong brewed coffee (cooled) – for best results, use a strong blend, perhaps an espresso for a robust flavor that captures the essence of classic tiramisù. The coffee should not only be strong but also well-brewed to ensure a rich flavor.
- 1 teaspoon of vanilla extract – this enhances the overall flavor profile, adding warmth and sweetness, which beautifully rounds out the other ingredients and adds depth to the truffles.
- Toppings:
- Extra cocoa powder for dusting – not only does this add flavor, but it also provides an attractive finish to the truffles. It gives them a professional look that is sure to impress, enticing anyone who sees them.
- Chocolate shavings or espresso beans for garnish (optional) – these add a touch of elegance and a delightful crunch; use dark chocolate shavings for a richer taste, or opt for milk chocolate for a sweeter contrast that balances the bitterness of the cocoa.
Note: For a richer coffee flavor, consider using espresso instead of brewed coffee, as the concentrated flavor will elevate the truffles. Also, if you want to make a gluten-free version, substitute the biscuits with gluten-free cookies designed for dessert recipes. For those who desire a more intense coffee experience, a dash of coffee liqueur, like Kahlúa, can also be a delectable addition, infusing the truffles with an additional layer of flavor that pairs beautifully with the chocolate. Check out our related guide for more tips on ingredient alternatives and enhancing your desserts.
Steps / Instructions
- Prepare the crust: In a large mixing bowl, combine the crushed digestive biscuits or ladyfingers with the cocoa powder. Mix well until the dry ingredients are evenly distributed, ensuring no clumps remain. This groundwork is crucial as it forms the base of the truffles, providing both structure and flavor, with the biscuits serving as the foundation that holds the truffles together.
- Make the filling: In another bowl, whisk together the mascarpone cheese, heavy cream, powdered sugar, brewed coffee, and vanilla extract. Use an electric mixer on medium speed for about 2-3 minutes, until the mixture is smooth and creamy. Take care to scrape down the sides of the bowl to ensure everything is well combined, resulting in a homogeneous filling that is free of lumps, which could impact the texture of your truffles.
- Combine mixtures: Gradually fold the dry ingredients into the mascarpone mixture. Use a spatula to combine until fully incorporated without overmixing. The mixture should be thick and slightly sticky, resembling a rich cookie dough that holds together well, yet is still soft enough to form into balls. This delicate folding is essential to maintain the airiness of the mixture.
- Chill the mixture: Cover the bowl with plastic wrap and refrigerate for about 30 minutes. This will make it easier to shape the truffles, as a chilled mixture holds its form better during rolling. You want the mixture to firm up just enough to make rolling easy and efficient, allowing for a seamless shaping process.
- Form the truffles: Once chilled, scoop out a tablespoon of the mixture and roll it between your palms to form a small ball. Repeat with the remaining mixture. You should have about 15-20 truffles, depending on your desired size; smaller truffles make for perfect bite-sized treats that are easy to pop in your mouth, making them ideal for parties or casual snacking.
- Coat the truffles: Roll each truffle in cocoa powder until fully coated. If desired, you can also roll them in chocolate shavings or top them with an espresso bean for added flair. This not only enhances their appearance but also complements the chocolate and coffee flavors beautifully, creating a multi-textural experience that will delight your palate.
- Chill again: Place the coated truffles on a baking sheet lined with parchment paper and refrigerate for at least another 30 minutes to set before serving. This final chilling step allows the flavors to meld and the texture to firm up, ensuring your truffles are perfectly delightful and ready to impress, providing a satisfying bite that melts in your mouth.
Tips & Tricks
- Storage: Store your no-bake tiramisù truffles in an airtight container in the refrigerator. They can last up to a week, but they’re best enjoyed within the first few days for optimal flavor and texture. If you plan to keep them longer, consider freezing them; to do so, layer them between sheets of parchment paper in a container to prevent sticking. This will help maintain their delightful texture and taste.
- Make-ahead option: These truffles can be made up to two days in advance. Just ensure they are well-covered to maintain freshness, and allow them to sit at room temperature for a few minutes before serving to soften slightly and enhance the flavor. Preparing in advance can save time on the day of your event.
- Avoiding common mistakes: Be gentle when incorporating the dry and wet ingredients. Overmixing can lead to a denser texture, which is not ideal for truffles. Aim for a light, fluffy mixture; it’s okay if small speckles of dry ingredients remain, as they will incorporate fully when chilled. Also, ensure your mascarpone is at room temperature to prevent a lumpy filling.
- Expert technique: To make perfectly round truffles, use a small ice cream scoop to keep the portions consistent before rolling them by hand. This ensures a uniform size and shape, making your truffles look professionally made. Additionally, lightly greasing your hands with a bit of oil can help prevent sticking during the rolling process, leading to a smoother handling experience.
Conclusion
Now that you know how to make no-bake tiramisù truffles, you can impress your friends and family with this easy, decadent dessert! With their rich coffee flavor and creamy texture, these truffles are the perfect treat for any occasion. Whether you’re hosting a dinner party or simply craving something sweet, these bite-sized Italian desserts are sure to be a hit! Serve them as a grand finale to a meal, or enjoy them as a luxurious snack. Don’t forget to share your experiences and any twists you put on the recipe; we love to hear from fellow dessert enthusiasts!
No-Bake Tiramisu Truffles
These delightful Italian dessert truffles take the classic flavors of traditional tiramisù and transforms them into rich, bite-sized truffles that require no baking at all. Perfect for gatherings, these indulgent sweet treats are easy to make and incredibly satisfying, especially for coffee lovers.
Ingredients
- 1 cup of crushed digestive biscuits or ladyfingers
- ¼ cup of cocoa powder (preferably unsweetened)
- 8 oz (225g) of mascarpone cheese (at room temperature)
- ½ cup of heavy cream
- ¼ cup of powdered sugar
- 2 tablespoons of strong brewed coffee (cooled)
- 1 teaspoon of vanilla extract
- Extra cocoa powder for dusting
- Chocolate shavings or espresso beans for garnish (optional)
Directions
In a large mixing bowl, combine the crushed digestive biscuits or ladyfingers with the cocoa powder. Mix well until the dry ingredients are evenly distributed.
In another bowl, whisk together the mascarpone cheese, heavy cream, powdered sugar, brewed coffee, and vanilla extract. Use an electric mixer on medium speed for about 2-3 minutes until smooth and creamy.
Gradually fold the dry ingredients into the mascarpone mixture using a spatula until fully incorporated without overmixing.
Cover the bowl with plastic wrap and refrigerate for about 30 minutes.
Once chilled, scoop out a tablespoon of the mixture and roll it into a small ball. Repeat with the remaining mixture.
Roll each truffle in cocoa powder until fully coated. Optionally, roll them in chocolate shavings or top with an espresso bean.
Place the coated truffles on a baking sheet lined with parchment paper and refrigerate for at least another 30 minutes to set.
Recipe Reviews
- ★★★★★
Excellent recipe!
Leave a Reply
Your email address will not be published. Required fields are marked *

Excellent recipe!