

Indulging in a rich and creamy dessert is always a delight, but when that dessert combines the nostalgic crunch of cereal with the smoothness of cheesecake, it becomes something truly special. Enter the Cinnamon Toast Crunch Cheesecake, a delightful fusion of flavors that will transport you back to your childhood breakfast table while impressing guests at your next gathering. This no-bake cheesecake recipe not only saves time but also delivers a sweet and crunchy dessert that everyone will love. With its unique cereal crust and creamy filling, this cheesecake is an indulgent treat that stands out among classic dessert recipes. The combination of textures—from the crunchy cereal crust to the velvety cream cheese filling—creates a harmonious balance that is simply irresistible. Plus, the hint of cinnamon ties it all together, making each bite reminiscent of your favorite childhood cereal, evoking warm memories and smiles. It’s a dessert that feels both familiar and innovative, bringing joy to those who experience it. Whether served at a birthday party, holiday gathering, or simply as a sweet ending to a weeknight dinner, this cheesecake is sure to delight and satisfy, leaving everyone craving just one more slice.
Ingredients
To make a delicious Cinnamon Toast Crunch Cheesecake, gather the following ingredients: You can learn more about this topic. Accurate measurements and quality ingredients are key to achieving the perfect texture and flavor. Make sure to source the freshest ingredients for the best results, as they significantly impact your final product and the overall taste of your cheesecake.
- For the crust:
- 2 cups Cinnamon Toast Crunch cereal, providing a sweet, crunchy base that is both nostalgic and unique. This cereal gives the crust its distinctive flavor and crunch, which is a fantastic base for the cheesecake. You can also lightly toast the cereal for added depth of flavor.
- 1/2 cup unsalted butter, melted, which acts as the binder for the crust and adds richness. Using unsalted butter allows you to control the sweetness of the crust better, ensuring that it complements the filling without overpowering it.
- 1/4 cup granulated sugar, to enhance the sweetness and help the crust hold together. The sugar also caramelizes slightly during the chilling process, adding extra flavor. If you prefer a less sweet crust, you can reduce the sugar to 2 tablespoons.
- For the filling:
- 16 oz cream cheese, softened, for a rich, creamy texture that forms the base of the cheesecake. Ensure it’s well-softened for the smoothest mixture; this can take about 30 minutes at room temperature.
- 1 cup powdered sugar, which sweetens the filling and adds a light, fluffy texture. Sifting the powdered sugar can prevent lumps from forming and ensure even distribution throughout the mixture.
- 1 tsp vanilla extract, adding depth and a lovely aroma to the filling. A high-quality pure vanilla extract is recommended for the best flavor; you can also experiment with vanilla bean paste for a more intense taste.
- 1 cup heavy whipping cream, essential for achieving a light and airy texture. Whipping this to stiff peaks is crucial for the cheesecake’s overall fluffiness; it should hold its shape when lifted with a whisk.
- 2 tsp ground cinnamon, which infuses the cheesecake with warmth and spice, enhancing the overall flavor. Freshly ground cinnamon can intensify the flavor profile even more, offering a more pronounced cinnamon taste.
- For the toppings:
- 1/2 cup Cinnamon Toast Crunch cereal (for garnish), providing an extra crunch and visual appeal. This topping not only adds texture but also reinforces the cinnamon flavor, making each slice even more enticing.
- Caramel sauce (optional, for drizzling), to add a touch of sweetness and a delightful flavor contrast. A homemade caramel sauce can elevate the dessert even further, allowing for customization in sweetness and flavor.
- Whipped cream (optional, for serving), which enhances the creamy texture and adds an elegant touch. Homemade whipped cream can be flavored with a hint of cinnamon for a cohesive taste that ties back to the cheesecake itself.
Ensure that your cream cheese is at room temperature for easy mixing, allowing for a smooth filling without lumps. Feel free to substitute the butter with a dairy-free alternative if necessary, such as coconut oil or a plant-based butter. For those looking to add a unique twist, consider using flavored cream cheese for added depth, such as a vanilla or cinnamon cream cheese. Check out our related guide for more tips on customizing your cheesecake, including alternative crust options and flavor enhancements that can personalize your dessert.
Steps / Instructions
- Prepare the crust: In a food processor, pulse the 2 cups of Cinnamon Toast Crunch cereal until finely crushed into a sandy texture. This will ensure a cohesive crust that holds its shape when set. Add the melted butter and granulated sugar, and pulse until the mixture resembles wet sand, indicating it’s ready to be pressed into the pan. The mixture should hold together when squeezed in your hand, which means it’s ready to mold into a crust.
- Form the crust: Press the cereal mixture into the bottom of a 9-inch springform pan, ensuring it is evenly distributed and firmly packed. Use a flat-bottomed glass or measuring cup to help pack it tightly. Ensure the crust is about 1/4 inch thick for optimal texture and strength. Place it in the freezer while you prepare the filling, which allows it to firm up and hold its shape, providing a sturdy base for the creamy filling.
- Make the filling: In a large mixing bowl, beat the softened cream cheese with an electric mixer until creamy and smooth, taking care to scrape down the sides to incorporate everything evenly. Gradually add the powdered sugar, vanilla extract, and ground cinnamon, mixing until well combined and fluffy, which should take about 2-3 minutes. The mixture should be silky and free of lumps, ensuring a smooth cheesecake that will slice beautifully.
- Whip the cream: In another bowl, whip the heavy cream until stiff peaks form, typically taking around 3-5 minutes on medium-high speed. This will help add lightness to your cheesecake filling, making it airy and delightful. Make sure to keep an eye on the cream while whipping to avoid over-whipping, as this can result in a grainy texture.
- Combine the mixtures: Gently fold the whipped cream into the cream cheese mixture in three additions, using a spatula to carefully mix without deflating the whipped cream. The goal is to maintain that fluffy texture while ensuring the ingredients are fully incorporated. Take your time with this step; a gentle folding motion helps keep the mixture light and airy, resulting in a delightful cheesecake.
- Assemble the cheesecake: Pour the filling over the prepared crust, smoothing the top with a spatula to create an even surface. This is crucial for aesthetics as well as even chilling. Tap the pan gently on the counter to remove any air bubbles, which helps avoid unsightly holes in your cheesecake and ensures a beautiful presentation.
- Chill: Cover the cheesecake with plastic wrap and refrigerate for at least 4 hours or overnight to allow it to set properly. This chilling time is crucial for achieving the right texture; the longer it chills, the firmer the cheesecake will become, making it easier to slice.
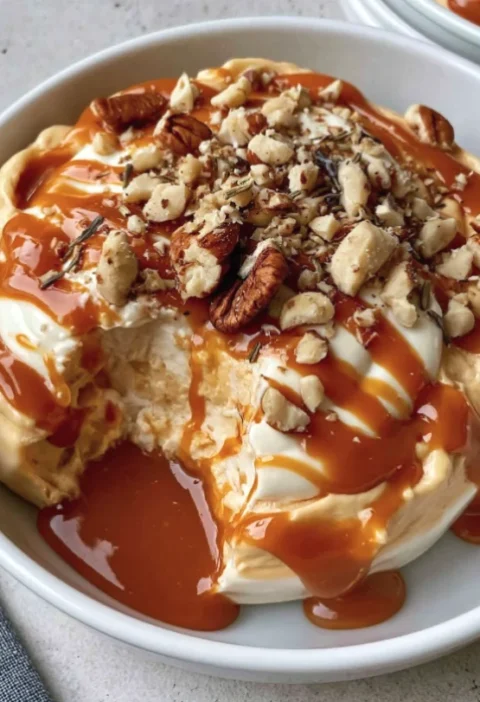
- Serve: Once set, carefully remove the sides of the springform pan. Garnish the top with additional Cinnamon Toast Crunch cereal and drizzle with caramel sauce if desired, enhancing both presentation and flavor. Serve chilled for the best experience, and consider slicing it into small pieces to showcase the layers, inviting guests to enjoy this delicious dessert.
Tips & Tricks
To ensure your Cinnamon Toast Crunch Cheesecake turns out perfectly, consider the following tips:
- For a richer flavor, use high-quality cream cheese and fresh heavy cream; this will elevate the taste and texture of your cheesecake significantly. Brands like Philadelphia or mascarpone can enhance creaminess, resulting in a dessert that feels indulgent.
- If you prefer a firmer cheesecake, allow it to chill for up to 8 hours or overnight, as this will help the filling set properly. The time spent chilling is crucial for achieving that perfect slice, ensuring it holds its shape when served.
- To avoid cracks on the surface, ensure that all ingredients are at room temperature before mixing, as this creates a smoother batter that sets evenly. This simple step can make a big difference in the final appearance of your cheesecake.
- For easy removal, run a knife around the edge of the cheesecake before releasing the springform pan; this prevents sticking and keeps the sides looking clean, allowing for a professional finish.
- Store any leftovers in an airtight container in the refrigerator for up to 3 days; you may find that the flavors develop even more over time, allowing the cinnamon to infuse throughout, enhancing the overall taste.
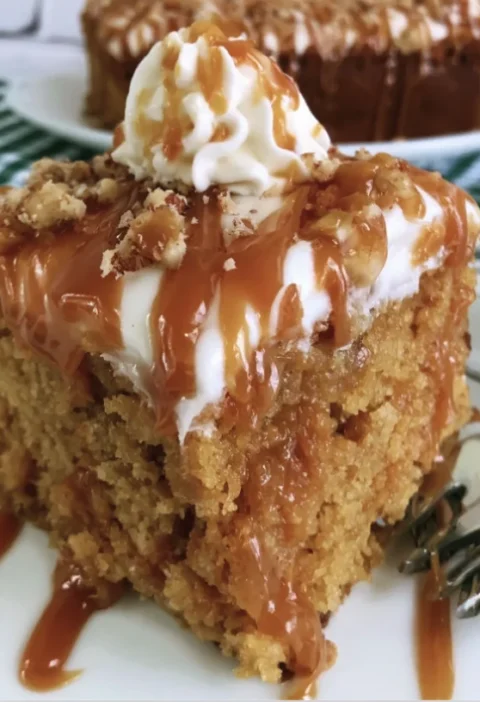
- Consider using a piping bag to add decorative whipped cream on top for a professional presentation, if desired. Adding a sprinkle of cinnamon on top can also enhance the visual appeal, making it an even more enticing dessert option.

Cinnamon Toast Crunch Cheesecake
Indulging in a rich and creamy dessert is always a delight, but when that dessert combines the nostalgic crunch of cereal with the smoothness of cheesecake, it becomes something truly special. This no-bake cheesecake recipe not only saves time but also delivers a sweet and crunchy dessert that everyone will love.
Ingredients
- 2 cups Cinnamon Toast Crunch cereal
- 1/2 cup unsalted butter, melted
- 1/4 cup granulated sugar
- 16 oz cream cheese, softened
- 1 cup powdered sugar
- 1 tsp vanilla extract
- 1 cup heavy whipping cream
- 2 tsp ground cinnamon
- 1/2 cup Cinnamon Toast Crunch cereal (for garnish)
- Caramel sauce (optional, for drizzling)
- Whipped cream (optional, for serving)
Directions
Prepare the crust: In a food processor, pulse the 2 cups of Cinnamon Toast Crunch cereal until finely crushed into a sandy texture. Add the melted butter and granulated sugar, and pulse until the mixture resembles wet sand.
Form the crust: Press the cereal mixture into the bottom of a 9-inch springform pan, ensuring it is evenly distributed and firmly packed. Place it in the freezer while you prepare the filling.
Make the filling: In a large mixing bowl, beat the softened cream cheese with an electric mixer until creamy and smooth. Gradually add the powdered sugar, vanilla extract, and ground cinnamon, mixing until well combined.
Whip the cream: In another bowl, whip the heavy cream until stiff peaks form. This will help add lightness to your cheesecake filling.
Combine the mixtures: Gently fold the whipped cream into the cream cheese mixture in three additions, using a spatula to carefully mix without deflating the whipped cream.
Assemble the cheesecake: Pour the filling over the prepared crust, smoothing the top with a spatula.
Chill: Cover the cheesecake with plastic wrap and refrigerate for at least 4 hours or overnight to allow it to set properly.
Nutrition Facts
Recipe Reviews
- ★★★★★
Excellent recipe!
Leave a Reply
Your email address will not be published. Required fields are marked *
Excellent recipe!