
Introduction
Making easy homemade condensed milk is a delightful culinary adventure that brings rich, creamy sweetness to your kitchen with only three ingredients. Imagine the satisfaction of creating a versatile ingredient that can elevate numerous dessert recipes, from traditional baked goods to modern no-bake treats. Condensed milk is a staple in many cultures, cherished for its ability to add depth and richness to desserts. For example, in Latin American cuisines, it’s often used in the beloved treat, tres leches cake, which is renowned for its moist, milky texture. Whether you’re crafting a Cookies & Cream Cake or a Vanilla Custard Filled Donuts, this homemade version ensures you have a fresh, preservative-free ingredient. Let’s dive into the simplicity and magic of making your own sweetened condensed milk recipe from scratch. The process not only saves you a trip to the store but also gives you a deeper appreciation for this sweet kitchen staple.
Condensed milk’s history is quite fascinating. Originally developed in the 19th century as a way to preserve milk before refrigeration, it quickly became a pantry staple across the globe. Its long shelf life and concentrated sweetness made it an invaluable ingredient for bakers and dessert enthusiasts alike. Today, making your own easy homemade condensed milk at home not only connects you with history but also gives you the control to adjust sweetness and flavors to your liking. It’s a small but rewarding project that can elevate your baking game to new heights, offering a personal touch to every dish you create.
Ingredients
- Milk: 2 cups of whole milk. For those looking for milk alternatives for desserts, try using almond milk or coconut milk for a unique twist. Almond milk will add a subtle nutty undertone, while coconut milk imparts a tropical flavor. If you’re aiming for a richer consistency, consider using evaporated milk as a base for your condensed version.
- Sugar: 2/3 cup of granulated sugar. Use superfine sugar for quicker dissolving if preferred. If you’re aiming for a more caramel-like flavor, consider adding a touch of brown sugar. For a slight flavor variation, you could also experiment with honey or maple syrup, but be mindful of the altered sweetness levels.
- Butter: 2 tablespoons of unsalted butter to add a creamy texture. A pinch of salt can be added if using salted butter. This small amount of butter not only enriches the flavor but also enhances the silky consistency of the condensed milk. If you’re vegan, you might substitute with coconut oil or a plant-based butter alternative for a non-dairy version.
Steps / Instructions
- In a medium saucepan, combine the milk and sugar over medium heat. Stir the mixture gently until the sugar has completely dissolved. This initial step is crucial for achieving a smooth texture, so be patient and keep the liquid moving. Think of this as the foundation of your condensed milk, where patience pays off with a perfectly smooth result. If bubbles start forming too rapidly, reduce the heat slightly to ensure a gentle simmer.
- Once the sugar is fully dissolved, reduce the heat to low. Allow the mixture to simmer gently. It’s important to maintain a low heat to avoid curdling the milk. Stirring occasionally helps maintain an even temperature throughout the mixture. Use a wooden spoon for stirring to prevent scratching your saucepan and to provide better control over the stirring process.
- Simmer for approximately 35 to 40 minutes, stirring occasionally. You will notice the mixture reducing and thickening. It should ultimately shrink to about half of its original volume. Keep an eye on the color and consistency; it should be creamy and slightly golden. If using a thermometer, aim for a temperature of around 215°F (102°C), which indicates the right thickness.
- As it simmers, use a spoon to skim off any skin that forms on the surface. This ensures a silky end product. Keeping the surface clear allows the mixture to reduce evenly without unwanted texture. Skimming is especially important if you’re making larger batches, as more skin can form when there’s a greater surface area.
- Remove the saucepan from the heat and stir in the butter until completely melted and incorporated. This step adds the essential creamy richness expected in condensed milk. The butter lends a glossy finish to your homemade creation. Make sure the butter is fully integrated for a consistent texture throughout your milk.
- Let the condensed milk cool before transferring it to an airtight container. The cooling is crucial as it allows the flavors to meld and the texture to set properly. During this time, you’ll see how the mixture transitions to a thicker, smoother consistency. If you’re planning to use it immediately in a recipe, allow it to cool to at least room temperature.
- Store in the refrigerator for up to two weeks, ready to be used in your favorite desserts or beverages. The chilled environment helps preserve the rich, homemade flavor you’ve created. If you notice any separation after storing, a quick stir will usually bring it back together.
Tips & Tricks
- Storage Tips: Keep your homemade condensed milk in a clean, airtight container to extend its shelf life. If you’re storing it in a jar, ensure the lid is tightly sealed to avoid any exposure to air. Consider labeling the container with the date you made it to keep track of its freshness.
- Make-Ahead Options: This DIY condensed milk can be made in batches and frozen for later use. Just ensure it’s in a freezer-safe container. Thaw it slowly in the refrigerator before use, giving it a good stir to restore its creamy consistency. Freezing in smaller portions can be convenient, allowing you to thaw only what you need each time.
- Common Mistakes: Avoid high heat to prevent curdling. Stir regularly to prevent the sugar from burning at the bottom of the pan. If you notice any signs of curdling, immediately reduce the heat and continue stirring. It’s also beneficial to use a heavy-bottomed saucepan, which helps distribute the heat more evenly and reduces the risk of burning.
- Pro Techniques: For a quicker method, use a food processor to mix the ingredients, then reduce on the stovetop. This can speed up the initial combination of ingredients, ensuring a more uniform mixture right from the start. Additionally, a slow cooker can maintain a steady low heat, reducing the risk of curdling and allowing for a hands-off method.
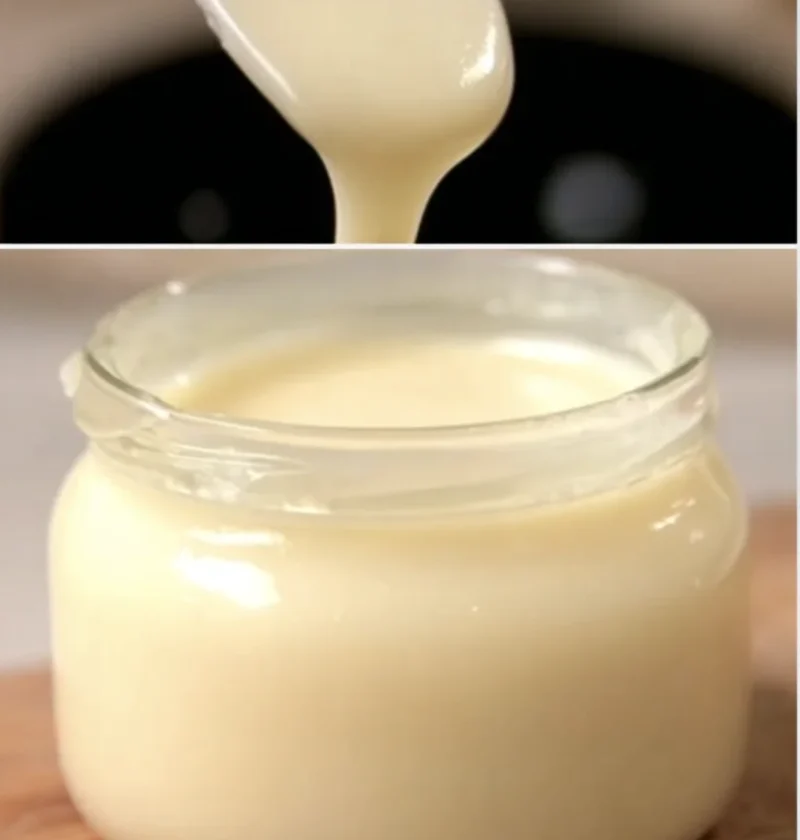
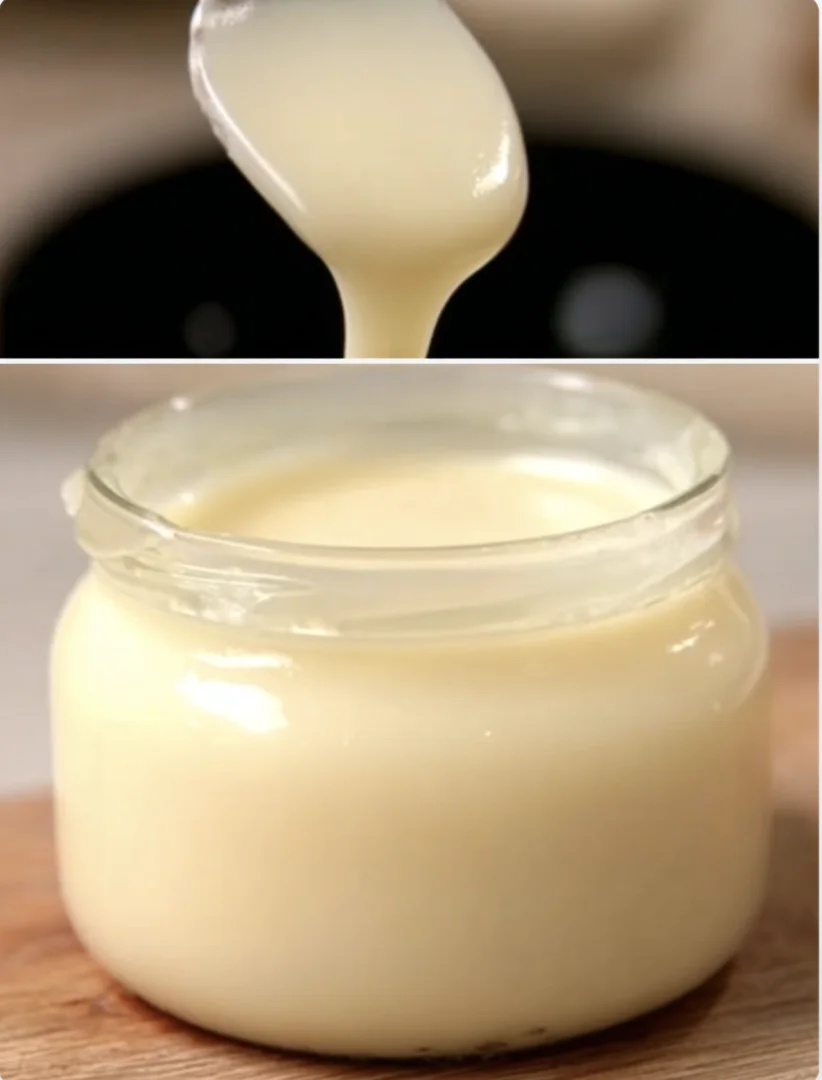
- Visual Cues: Look for a thick, syrup-like consistency when checking if your condensed milk is done. It should coat the back of a spoon without being runny. When you run your finger across the coated spoon, the line should remain clear, indicating the perfect thickness.
Conclusion
Creating your own easy homemade condensed milk is a rewarding experience that opens up endless possibilities in the kitchen. Its rich and creamy texture makes it a perfect addition to a wide variety of creamy milk recipes. Imagine the flavor it would add to a homemade ice cream or a silky pie filling. Whether you’re enhancing a batch of Easy Chocolate Desserts or exploring new flavor combinations, this DIY condensed milk brings both convenience and quality to your culinary creations. We hope this guide inspires you to try making your own sweetened condensed milk recipe and to explore the delicious potential it holds. Share your creations and feedback with us; we’d love to hear how this simple cooking method has enriched your dessert-making adventures! Indulge in the deeply satisfying process of making something homemade, and savor the sweet results in every bite. Check out our related guide for more tips.
As you delve into the world of homemade ingredients, the impact of making your own staples becomes evident. Not only do you save on grocery costs and reduce waste, but you also gain the ability to tweak and experiment with flavors, creating a product that truly reflects your taste preferences. Invite others to join you in this culinary endeavor. It’s a wonderful way to spend time with family or friends, sharing the joys and the occasional humorous mishaps of cooking from scratch. Ultimately, the experience is as enriching as the delicious, creamy outcome of your homemade condensed milk.
Easy Homemade Condensed Milk
Making easy homemade condensed milk is a simple process that requires only three ingredients. This homemade version ensures you have a fresh, preservative-free ingredient for your desserts.
Ingredients
- 2 cups of whole milk
- 2/3 cup of granulated sugar
- 2 tablespoons of unsalted butter
Directions
In a medium saucepan, combine the milk and sugar over medium heat. Stir until the sugar has completely dissolved.
Reduce the heat to low and allow the mixture to simmer gently. Stir occasionally.
Simmer for approximately 35 to 40 minutes, stirring occasionally, until the mixture reduces to about half of its original volume.
Skim off any skin that forms on the surface to ensure a silky end product.
Remove from heat and stir in the butter until completely melted and incorporated.
Let the condensed milk cool before transferring it to an airtight container.
Store in the refrigerator for up to two weeks.
Recipe Reviews
- ★★★★★
Excellent recipe!
Leave a Reply
Your email address will not be published. Required fields are marked *


Excellent recipe!