
Introduction
Welcome to a delightful culinary journey where we explore the fusion of flavors in the scrumptious world of Yummy Easy Banana Pudding Cheesecake Cones. This delectable dessert combines the creamy richness of cheesecake with the comforting sweetness of banana pudding, all conveniently served in a handheld cone. Whether you’re a seasoned chef or a novice in the kitchen, this recipe is sure to impress your taste buds and leave you craving for more.
Banana pudding, with its luscious layers of ripe bananas, creamy pudding, and vanilla wafers, is a classic Southern dessert that evokes memories of family gatherings and cozy get-togethers. Cheesecake, on the other hand, with its velvety texture and tangy flavor, adds a sophisticated twist to this traditional favorite. By combining these two beloved treats in a portable cone form, we create a dessert that is not only visually appealing but also incredibly delicious.
Whether you’re hosting a summer barbecue, planning a picnic in the park, or simply treating yourself to a special dessert at home, these Banana Pudding Cheesecake Cones are the perfect sweet treat for any occasion. So, roll up your sleeves, gather your ingredients, and let’s embark on a culinary adventure that will tantalize your taste buds and satisfy your cravings.
Get ready to indulge in a delightful blend of flavors and textures as we guide you through the process of creating these irresistible Yummy Easy Banana Pudding Cheesecake Cones. Let’s dive into the world of decadent desserts and discover how simple it can be to create a masterpiece that will impress your family and friends.
Ingredients
To create these mouthwatering Banana Pudding Cheesecake Cones, you will need the following ingredients:
– Ripe bananas
– Cream cheese
– Sweetened condensed milk
– Vanilla extract
– Lemon juice
– Whipped cream
– Vanilla wafers
– Sugar
– Butter
– Waffle cones
– Optional garnishes: chocolate shavings, caramel sauce, sliced bananas
Ensure you have all the ingredients ready before you begin the preparation process to ensure a smooth and enjoyable cooking experience.
Now that we have gathered all the necessary ingredients, let’s move on to the exciting part – the steps to create these delectable Banana Pudding Cheesecake Cones.
Steps
1. Begin by preparing the banana pudding mixture. In a bowl, mash the ripe bananas until smooth. Add sweetened condensed milk, lemon juice, and vanilla extract, and mix until well combined.
2. In a separate bowl, beat the cream cheese and sugar until smooth and creamy. Fold in the whipped cream until fully incorporated.
3. Gently fold the banana pudding mixture into the cream cheese mixture until evenly combined.
4. Crush the vanilla wafers into small pieces and set aside. In a small saucepan, melt butter and add the crushed wafers, stirring until coated.
5. To assemble the cones, spoon a layer of the wafers into the bottom of each cone. Follow with a layer of the cheesecake-banana pudding mixture. Repeat the layers until the cones are filled, ending with a final layer of the cheesecake mixture.
6. Chill the filled cones in the refrigerator for at least 2 hours to allow the flavors to meld together and the mixture to set.
7. Before serving, garnish the cones with chocolate shavings, caramel sauce, or sliced bananas for an extra touch of indulgence.
Variations
Feel free to get creative with your Banana Pudding Cheesecake Cones by trying out different variations:
– Swap out the vanilla wafers for graham crackers or chocolate cookies for a unique twist.
– Add a layer of sliced strawberries or crushed pineapple for a fruity burst of flavor.
– Drizzle the cones with Nutella or peanut butter for a decadent touch.
– Experiment with different garnishes such as chopped nuts, sprinkles, or toffee bits.
By incorporating these variations, you can customize the recipe to suit your taste preferences and create a dessert that is truly your own.
Now that you have mastered the art of creating these delightful Banana Pudding Cheesecake Cones, here are some tips to enhance your cooking experience and ensure that your dessert turns out perfectly every time.
Tips
1. Use ripe bananas for the best flavor and sweetness in the pudding mixture.
2. Make sure the cream cheese is softened at room temperature before mixing to avoid lumps in the cheesecake filling.
3. Allow the cones to chill for an adequate amount of time to set the mixture and achieve the perfect consistency.
4. Get creative with your garnishes to add a personal touch and make your cones visually appealing.
5. Store any leftover Banana Pudding Cheesecake Cones in the refrigerator for up to 2 days for optimal freshness.
By following these tips, you can elevate your dessert-making skills and create a memorable culinary experience for yourself and your loved ones.
Conclusion
In conclusion, Yummy Easy Banana Pudding Cheesecake Cones offer a delightful combination of flavors and textures that are sure to please even the most discerning palates. With the perfect balance of creaminess, sweetness, and crunch, these handheld treats are a true indulgence for any dessert lover.
Whether you’re hosting a party, celebrating a special occasion, or simply craving a sweet pick-me-up, these Banana Pudding Cheesecake Cones are the ideal choice for a memorable and delicious dessert experience. So, gather your ingredients, follow the simple steps, and treat yourself to a culinary delight that will leave you craving for more.
FAQs
Q: Can I use store-bought banana pudding instead of making it from scratch?
A: Yes, you can substitute store-bought banana pudding for the homemade version to save time and effort.
Q: How long do the Banana Pudding Cheesecake Cones stay fresh?
A: The cones can be stored in the refrigerator for up to 2 days, but they are best enjoyed fresh for optimal taste and texture.
Q: Can I freeze the filled cones for later consumption?
A: It is not recommended to freeze the filled cones as the texture may become compromised upon thawing. It is best to enjoy them freshly made for the best experience.
Q: Can I make these cones in advance for a party?
A: Yes, you can prepare the cones a few hours ahead of time and chill them in the refrigerator until ready to serve. This allows you to focus on entertaining your guests while still serving a delicious dessert.

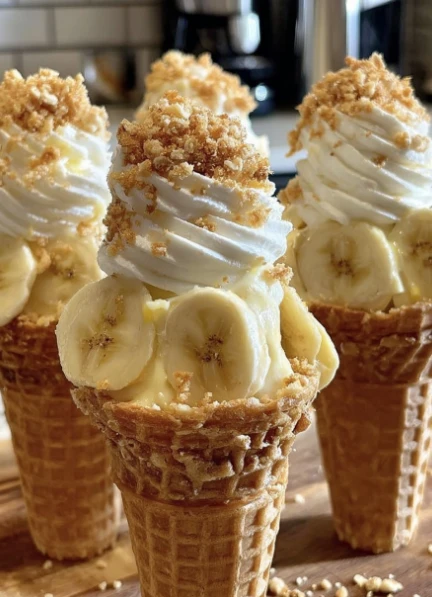
🤤🍌🍰🔥 Yummy Easy Banana Pudding Cheesecake Cones
Delicious handheld cones that combine the creamy richness of cheesecake with the comforting sweetness of banana pudding, featuring layers of ripe bananas, creamy pudding, vanilla wafers, and optional garnishes.
Ingredients
-
3 ripe bananas
-
8 oz cream cheese
-
14 oz sweetened condensed milk
-
1 tsp vanilla extract
-
1 tbsp lemon juice
-
1 cup whipped cream
-
1 cup vanilla wafers
-
1/4 cup sugar
-
2 tbsp butter
-
6 waffle cones
-
Optional garnishes: chocolate shavings, caramel sauce, sliced bananas
Directions
-
Begin by preparing the banana pudding mixture. Mash the ripe bananas in a bowl until smooth. Add sweetened condensed milk, lemon juice, and vanilla extract, mix until well combined.
-
In a separate bowl, beat cream cheese and sugar until smooth and creamy. Fold in the whipped cream until fully incorporated.
-
Gently fold the banana pudding mixture into the cream cheese mixture until evenly combined.
-
Crush the vanilla wafers into small pieces and set aside. Melt butter in a small saucepan, add the crushed wafers, stirring until coated.
-
To assemble the cones, spoon a layer of wafers into the bottom of each cone. Follow with a layer of the cheesecake-banana pudding mixture. Repeat the layers until cones are filled, ending with a final layer of the cheesecake mixture.
-
Chill the filled cones in the refrigerator for at least 2 hours to allow the flavors to meld together and the mixture to set.
-
Before serving, garnish the cones with chocolate shavings, caramel sauce, or sliced bananas for an extra touch of indulgence.