Butterfinger Balls Recipe
Introduction
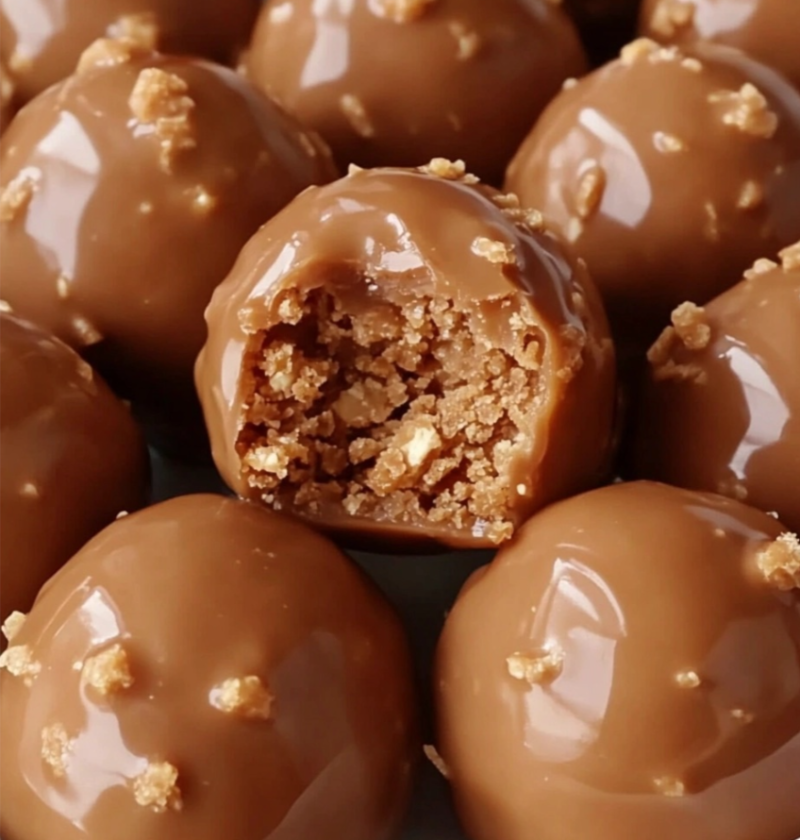
Welcome to our delicious Butterfinger Balls recipe! If you’re a fan of the classic Butterfinger candy bar, you’ll love these homemade treats. They’re easy to make and perfect for any occasion. Get ready to indulge in a sweet and crunchy delight!
Ingredients
For this recipe, you will need the following ingredients:
- 1 cup creamy peanut butter
- 1/2 cup powdered sugar
- 1/2 cup crushed Butterfinger candy bars
- 1/4 cup unsalted butter, melted
- 2 cups chocolate chips
Steps
Follow these steps to make Butterfinger Balls:
Step 1: Prepare the Peanut Butter Mixture
In a mixing bowl, combine the creamy peanut butter, powdered sugar, crushed Butterfinger candy bars, and melted unsalted butter. Mix well until all the ingredients are fully incorporated.
Step 2: Shape the Mixture into Balls
Using your hands, roll the peanut butter mixture into small balls, about 1 inch in diameter. Place the balls on a baking sheet lined with parchment paper.
Step 3: Chill the Balls
Place the baking sheet with the peanut butter balls in the refrigerator to chill for at least 30 minutes. This will help the balls firm up and hold their shape.
Step 4: Melt the Chocolate
In a microwave-safe bowl, melt the chocolate chips in 30-second intervals, stirring in between each interval. Continue until the chocolate is completely smooth and melted.
Step 5: Coat the Balls in Chocolate
Using a fork or toothpick, dip each chilled peanut butter ball into the melted chocolate, making sure to coat it completely. Place the coated ball back onto the baking sheet.
Step 6: Let the Chocolate Set
Allow the chocolate to set by placing the baking sheet back in the refrigerator for about 20 minutes. This will give the chocolate coating a nice, firm texture.
Variations
Feel free to get creative with your Butterfinger Balls recipe! Here are a few variations you can try:
Variation 1: White Chocolate Coating
If you prefer white chocolate, you can use white chocolate chips instead of regular chocolate chips for the coating. The creamy white chocolate pairs perfectly with the peanut butter and Butterfinger flavors.
Variation 2: Nutty Addition
For an extra crunch, you can add chopped nuts, such as almonds or peanuts, to the peanut butter mixture before shaping the balls. This will give your Butterfinger Balls a delightful nutty twist.
Tips
Here are some tips to help you make the best Butterfinger Balls:
- Make sure to crush the Butterfinger candy bars into small pieces. This will ensure a consistent distribution of the candy flavor throughout the balls.
- For easier shaping, you can lightly grease your hands with butter or cooking spray.
- When coating the balls in chocolate, tap off any excess chocolate to avoid a thick coating.
- Store the finished Butterfinger Balls in an airtight container in the refrigerator for up to a week.
Conclusion
Now you know how to make delicious Butterfinger Balls! These sweet and crunchy treats are perfect for parties, potlucks, or simply satisfying your sweet tooth. Give this recipe a try and enjoy the delightful combination of peanut butter, Butterfinger candy, and chocolate. You won’t be able to resist!
FAQs
Q: Can I use crunchy peanut butter instead of creamy?
A: Yes, you can use crunchy peanut butter if you prefer a bit of crunch in your Butterfinger Balls. It will add a different texture to the final result, but the taste will still be delicious!
Q: Can I freeze Butterfinger Balls?
A: Yes, you can freeze Butterfinger Balls for up to 3 months. Make sure to place them in an airtight container or freezer bag before freezing. Thaw them in the refrigerator before serving.
Q: Can I use a different candy bar instead of Butterfinger?
A: Absolutely! Feel free to experiment with different candy bars to create your own unique twist on this recipe. You can try Snickers, Kit Kat, or any other candy bar you love.