Introduction
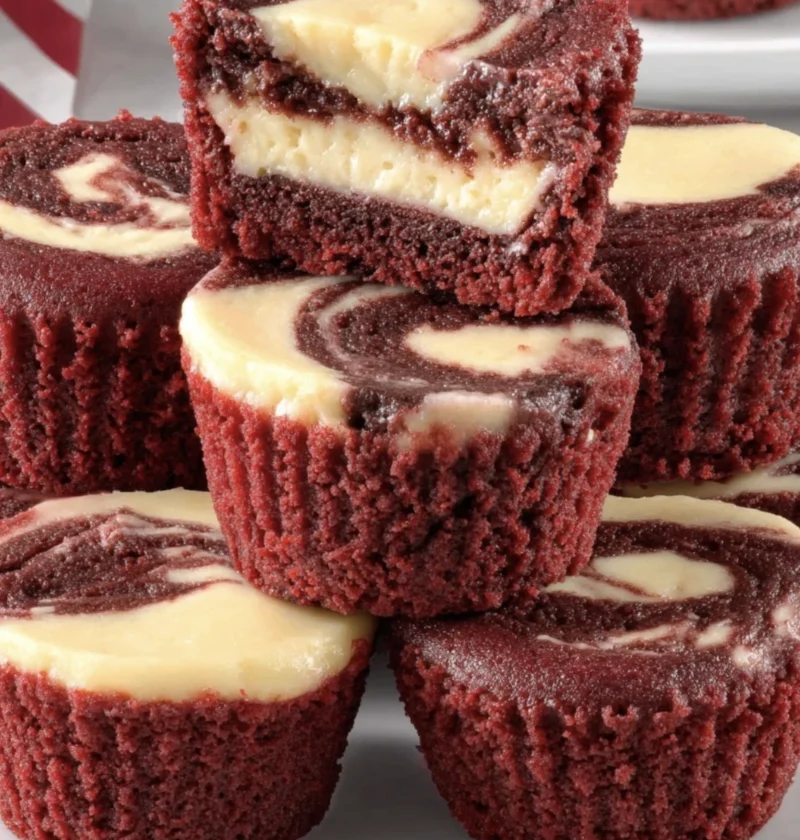
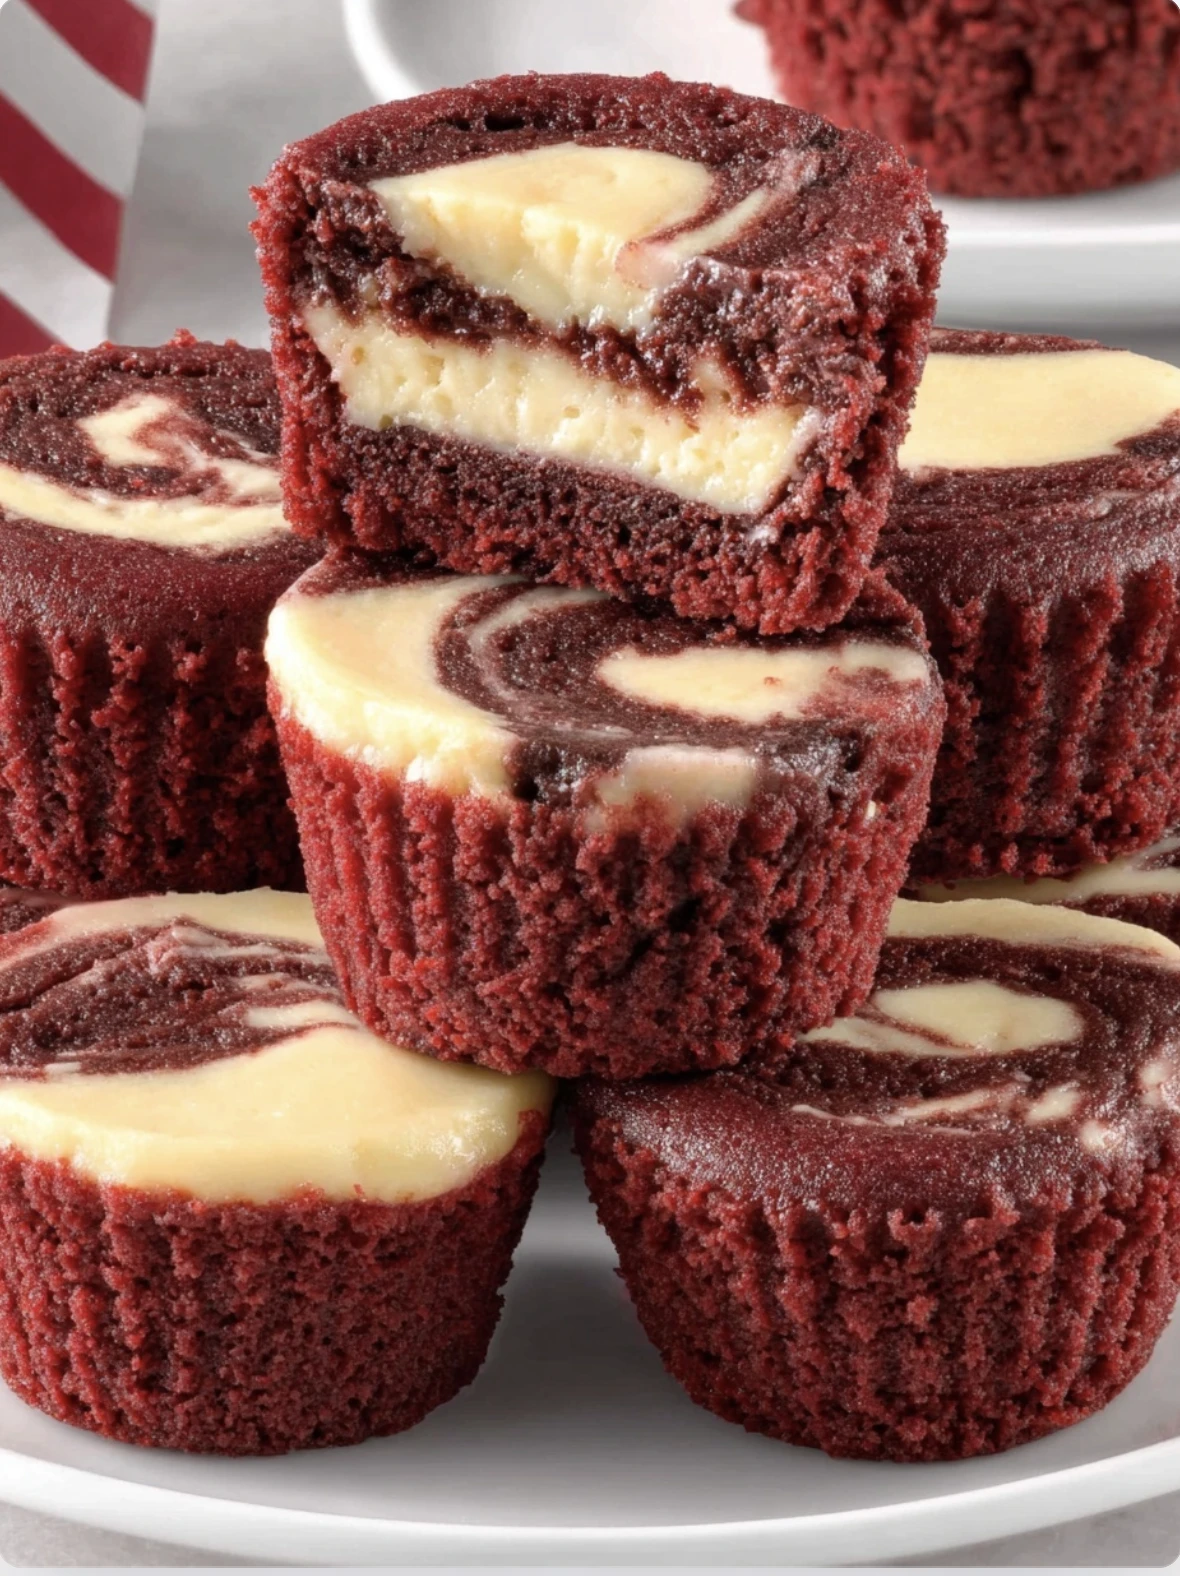
Mini red velvet cheesecakes are a delightful twist on the classic dessert, combining the rich flavors of red velvet cake with the creamy texture of cheesecake. These individual-sized treats are perfect for parties, gatherings, or simply indulging in a sweet craving. The combination of the tangy cream cheese filling and the hint of cocoa in the red velvet crust creates a harmonious blend of flavors that will have your taste buds dancing with joy.
Whether you are a seasoned baker or a novice in the kitchen, this recipe is sure to impress your family and friends. The vibrant red color of the cheesecakes makes them visually appealing, adding a pop of color to any dessert spread. Plus, the small size makes them easy to serve and enjoy without the need for slicing a large cake.
If you are ready to embark on a baking adventure and treat yourself to a decadent dessert, follow this step-by-step guide to create your own batch of mini red velvet cheesecakes that will leave everyone asking for more.
Ingredients
To make these delicious mini red velvet cheesecakes, you will need the following ingredients:
For the red velvet crust:
– 1 cup of red velvet cake mix
– 1/4 cup of unsalted butter, melted
– 1 egg
– 1/2 teaspoon of vanilla extract
– 1/4 cup of sugar
For the cheesecake filling:
– 8 oz of cream cheese, softened
– 1/4 cup of sugar
– 1 egg
– 1/2 teaspoon of vanilla extract
– Red food coloring (optional)
Steps
1. Preheat your oven to 350°F (180°C) and line a muffin tin with paper liners.
2. In a mixing bowl, combine the red velvet cake mix, melted butter, egg, vanilla extract, and sugar. Mix until well combined.
3. Divide the red velvet mixture evenly among the prepared muffin cups, pressing it down to form the crust.
4. In another bowl, beat the cream cheese and sugar together until smooth. Add the egg and vanilla extract, and mix until creamy.
5. If desired, add a few drops of red food coloring to the cheesecake mixture to enhance the color.
6. Spoon the cheesecake mixture over the red velvet crust in the muffin cups, filling each almost to the top.
7. Bake the mini cheesecakes for about 20-25 minutes, or until the edges are set but the center still jiggles slightly.
8. Remove the cheesecakes from the oven and let them cool in the pan for 30 minutes before transferring them to a wire rack to cool completely.
Variations
There are several ways to customize these mini red velvet cheesecakes to suit your taste preferences:
– Top each cheesecake with a dollop of whipped cream and a sprinkle of red velvet cake crumbs for added texture.
– Drizzle a cream cheese glaze over the cooled cheesecakes for an extra layer of sweetness.
– Garnish with fresh berries or chocolate shavings for a decorative touch.
– Experiment with different flavors of cake mix, such as chocolate or vanilla, for unique flavor combinations.
Feel free to get creative and make these mini red velvet cheesecakes your own by trying out different toppings and decorations.
Tips
Here are some helpful tips to ensure your mini red velvet cheesecakes turn out perfectly every time:
– Make sure all your ingredients are at room temperature before you begin to ensure a smooth and creamy cheesecake filling.
– Do not overmix the cheesecake batter, as this can incorporate too much air and lead to cracking during baking.
– Allow the cheesecakes to cool completely before serving to allow the flavors to develop and the texture to set.
– Store any leftover cheesecakes in the refrigerator in an airtight container for up to 3 days.
Conclusion
In conclusion, mini red velvet cheesecakes are a delightful and indulgent treat that combines the best of both worlds – the rich flavor of red velvet cake and the creamy goodness of cheesecake. Whether you are celebrating a special occasion or simply craving a sweet dessert, these mini cheesecakes are sure to please your taste buds and impress your guests.
By following this easy-to-follow recipe and incorporating your own personal touches, you can create a batch of mini red velvet cheesecakes that will be the star of any dessert table. So, gather your ingredients, preheat your oven, and get ready to enjoy a little slice of heaven in every bite!
FAQs
Q: Can I use a different cake mix flavor for the crust?
A: Yes, feel free to experiment with different cake mix flavors to create unique variations of these mini cheesecakes.
Q: Can I freeze these mini red velvet cheesecakes?
A: Yes, you can freeze the cheesecakes in an airtight container for up to one month. Thaw them in the refrigerator before serving.
Q: How can I prevent cracks from forming on the surface of the cheesecakes?
A: To prevent cracking, avoid overmixing the batter and do not overbake the cheesecakes. Additionally, you can bake the cheesecakes in a water bath to create a humid baking environment.
Mini Red Velvet Cheesecakes
Delightful mini red velvet cheesecakes that combine the rich flavors of red velvet cake with the creamy texture of cheesecake. Perfect for parties or indulging in a sweet craving.
Ingredients
-
1 cup red velvet cake mix
-
1/4 cup unsalted butter, melted
-
1 egg
-
1/2 teaspoon vanilla extract
-
1/4 cup sugar
-
8 oz cream cheese, softened
-
1/4 cup sugar
-
1 egg
-
1/2 teaspoon vanilla extract
-
Red food coloring (optional)
Directions
-
Preheat oven to 350°F (180°C) and line a muffin tin with paper liners.
-
Combine red velvet cake mix, melted butter, egg, vanilla extract, and sugar in a mixing bowl.
-
Divide red velvet mixture among muffin cups to form the crust.
-
Beat cream cheese and sugar until smooth, then add egg and vanilla extract.
-
Add red food coloring to the cheesecake mixture if desired.
-
Spoon cheesecake mixture over the crust in the muffin cups.
-
Bake for 20-25 minutes until edges are set but center jiggles slightly. Cool in the pan for 30 minutes, then transfer to a wire rack to cool completely.